
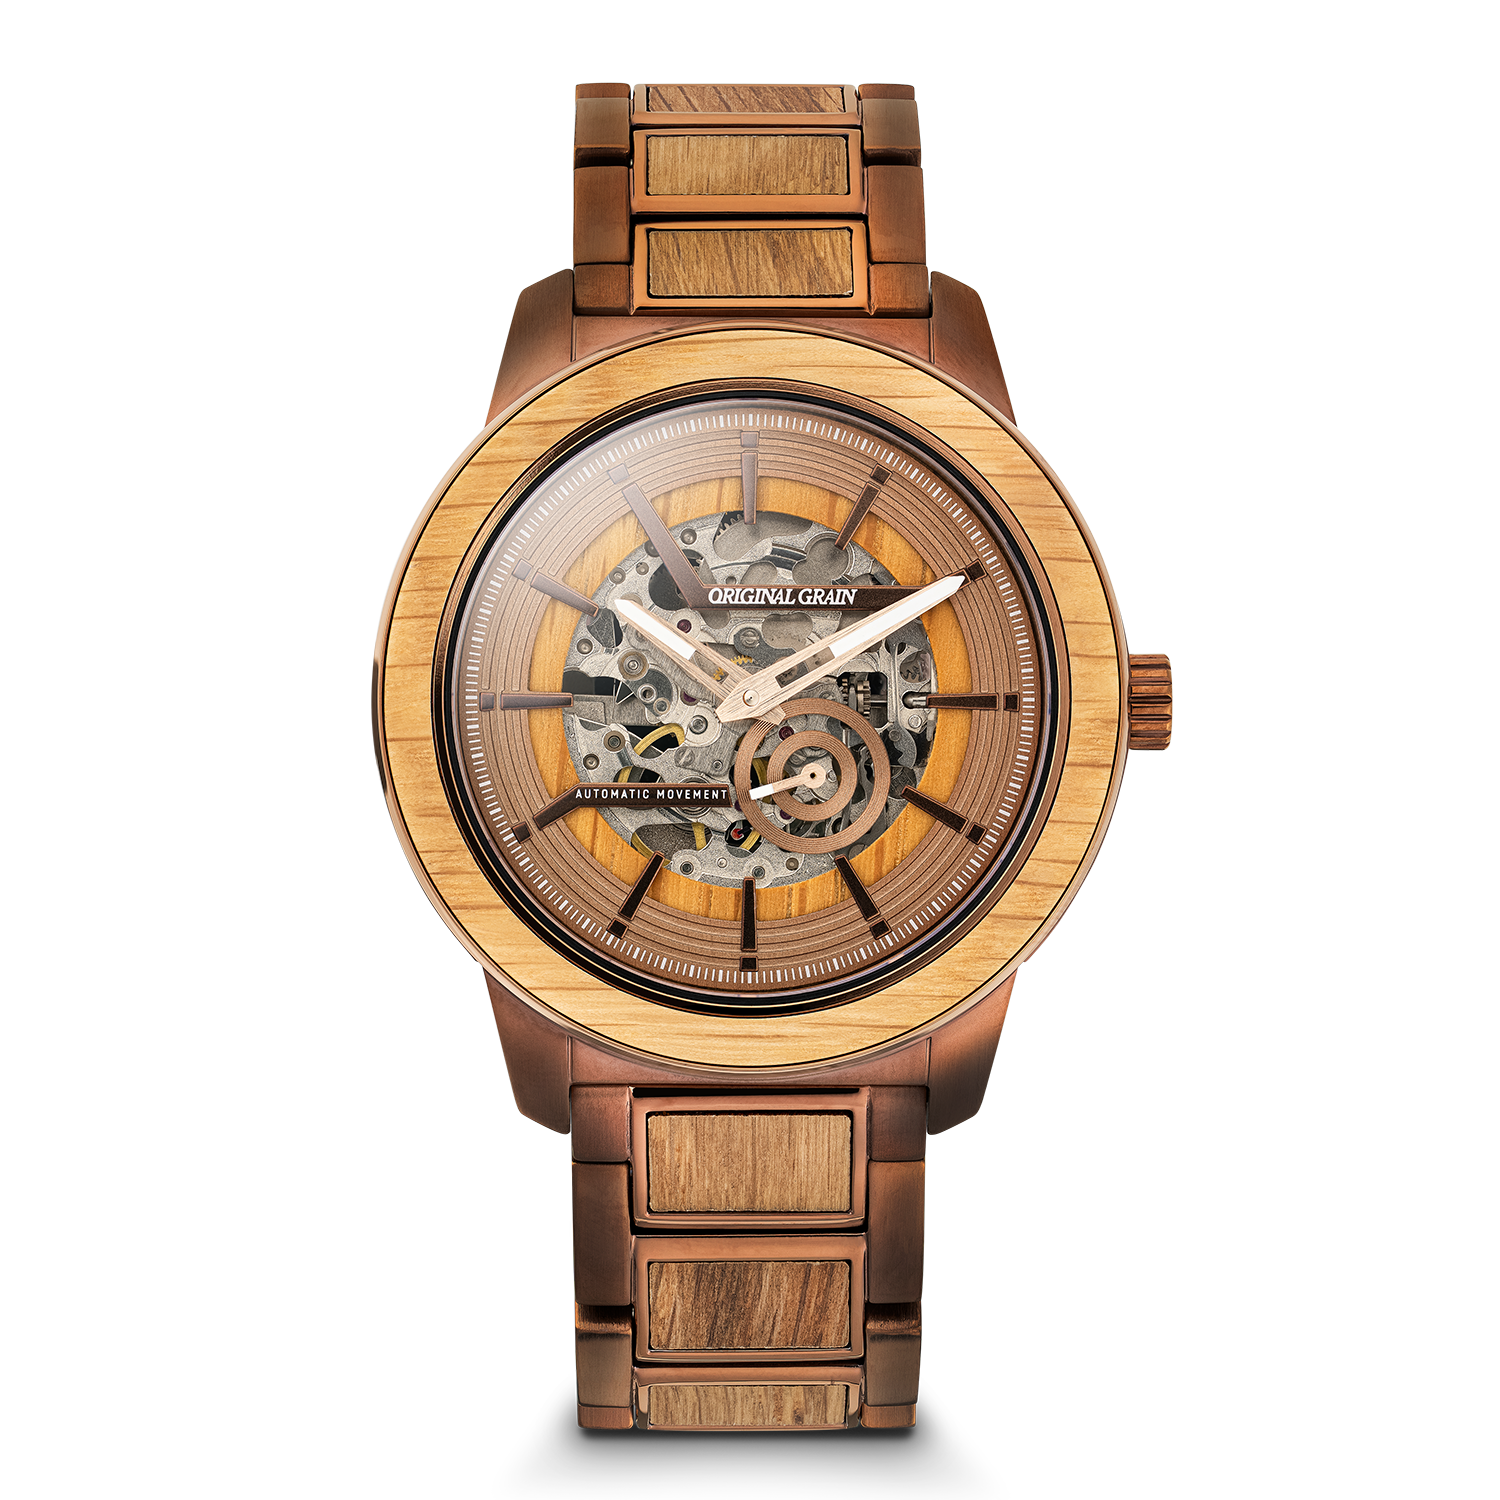
📸 How I Shoot Product Photos: My Watch E-Comm Workflow
Shooting e-comm product photos can feel like a beast—but once you lock in your process, it’s just step-by-step execution. Here’s how I shoot macro-stacked product photos for watches like the new Coffee Black line.
I started just like you might be, overwhelmed and thinking it was only possible to get “perfect” or at least as close as possible, ecomm photos without some crazy camera or robot or software or something. But, overtime I learned and kept trying to improve, scouring the internet for something like this honestly, but 3 years later and 100,000’s of photos later… I have a little system that along with practice and refinement, just like anything else, you should be able to see repeatable results like these!


This is my workflow—start to finish. Minimal fluff. Maximum clarity.
I’ll have to do deep dives on certain parts another time, ie: stacking. If you need help or would like more details on any step just reach out! Comment here or send me an email!
🛠️ Studio Setup
Get your white backdrop hung up!
Although we are going to cut out the background I like to use white so that the light bounces around, as opposed to black that would absorb our light!
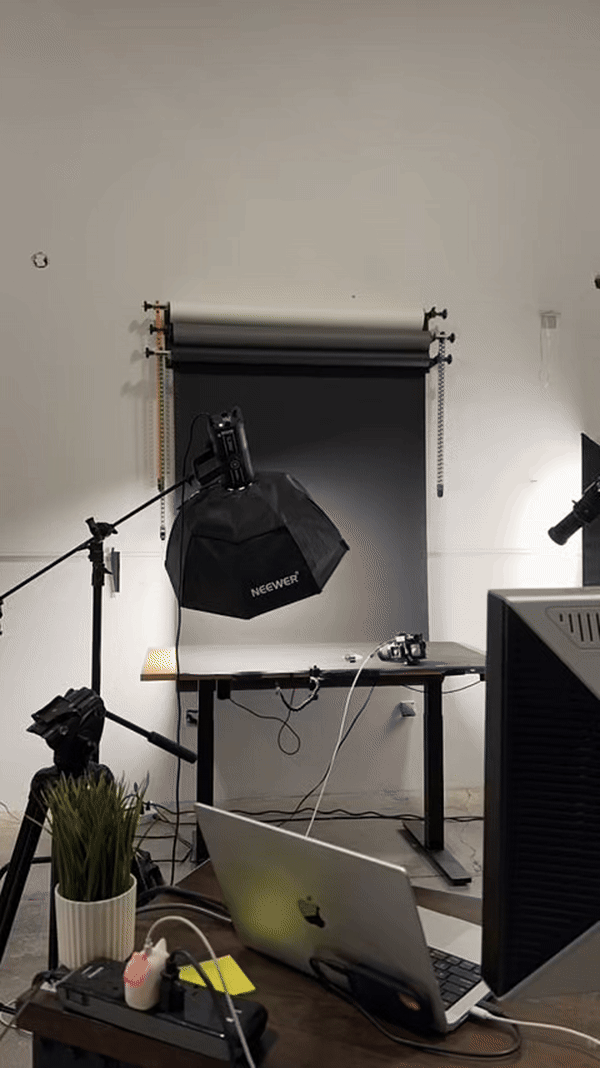
💡Set up lighting:
I usually just start by using my single light with a softbox/ house lights to see what I’m doing. Then add a fill or bounce, or usually when I’m shooting watches, I’ll use a cone off diffusion, to create nice even light all over
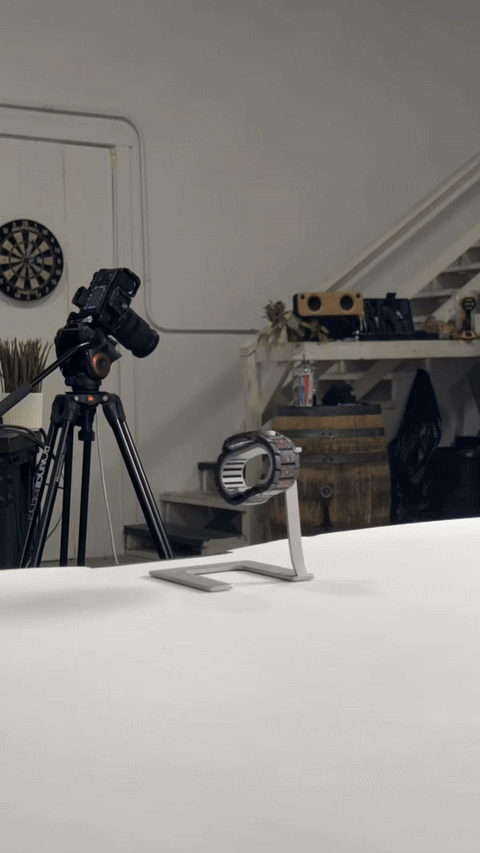
Tripod locked and leveled
I’m usually shooting for a straight on almost top down shot for the watches I shoot so I angle my camera so that the watch face is pointed directly at my lens
📷Camera dialed in:
At first I’m just looking to align my composition but here are the settings I ended up shooting with (may have to adjust depending on how much light you have)
⚙️1/25 sec @ f / 5.6, ISO 100
breakdown on settings later, but we are looking to keep our ISO as low as possible to preserve details (iso=grain)
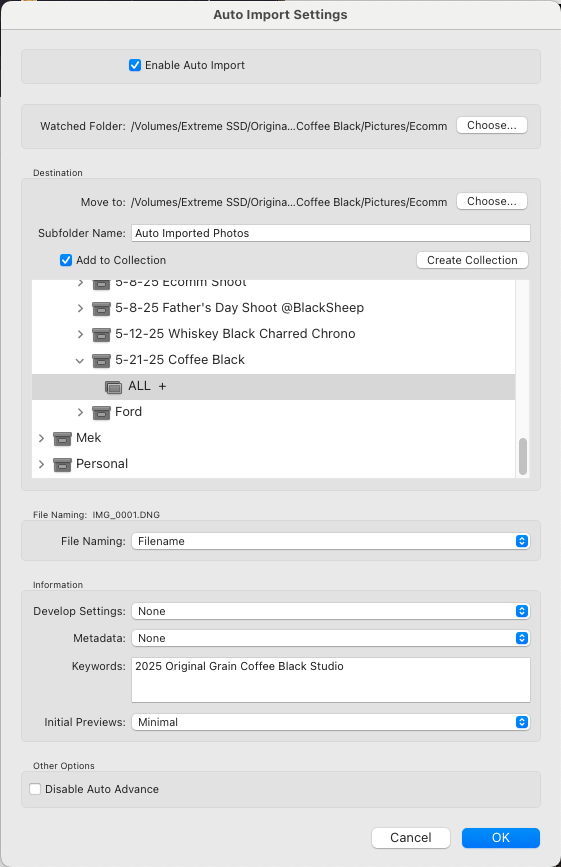
🧠 File Structure + Software
📂Project folder created - first things first, gotta stay orgainized
usually rename template folder to (date + project name)
always working off an SSD
I duplicate a template with my folder structure already built out
Add a folder called Ecomm inside of pictures
📷↔️💻Tether session
Imaging Edge is the software I use with my a7iii (from sony)
Camera connected
Save folder set
MUST DO THIS BEFORE OPENING UP LIGHTROOM (for some reason)

Lightroom setup:
New collection set + collection
Auto Import set to the folder we just made

📷 Shooting Process
Take a test shot
adjust lighting until you like what you’re getting
protect those highlights! I typically underexpose and adjust in post!
Manually set focus to the closest point
Bump focus back two steps (just in case)
Start taking photos, moving your focus toward the back using the tether software to take photos and move focus (no movement of camera or subject or change in lighting)
Fire off as many shots as needed to cover full depth of product
I typically take 35-50 for my ecomm photos, could probably use far fewer, but this is my process

Align to e-comm template (my process so that all the photos for Original Grain are aligned to the same template, the photographer that used to shoot these passed the template on to me, shoutout Jose!🙏🏻)

stacked RAW

Stacked + color + exposure edits

🧠 Bonus Tips
Keeping the watch crystal clean is everything. Dust ruins detail. (less work in post)
Always set your tether save location early—don’t be the guy who loses a stack.
Use soft light
Find an editor for touch ups, if you’re doing product ecomm shots consistently.
Have fun and keep learning!